Your ads will be inserted here by
Easy Plugin for AdSense.
Please go to the plugin admin page to
Paste your ad code OR
Suppress this ad slot.
Disclaimer: This blog post contains affiliate links. I will earn a commission if you purchase through these links. You do not need to purchase through these links although I greatly appreciate it if you do! 🙂
For any of you who have been thinking about creating a blog, this post is for you! When I first had the thought to create one I wasn’t sure what to expect. However, I can now say that it was surprisingly much easier than I had anticipated, and tons of fun! The first four steps to beginning your blog are listed below, so, let’s get started. 🙂
The 4 steps to starting your blog are:
1. Domain Hosting
2. Choosing a Name
3. Installing WordPress
4. Picking a theme (to make it look the way you want it).
1. Domain Hosting
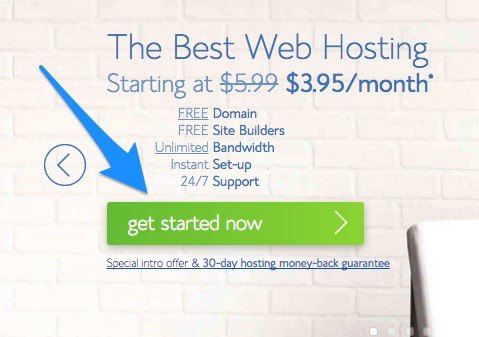
To get your domain hosting, head on over to Bluehost and click the green button that says, “get started now.”
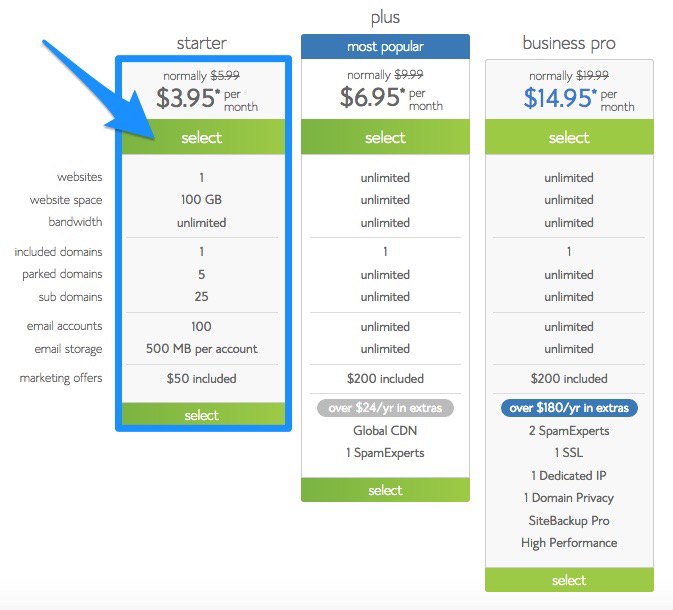
They will ask you to select a plan. I’d suggest the starter plan as it is the most economical and will save you a lot of money over time.
2. Picking a Name
Next, you get to come up with what you want to call your site. You can do this by brainstorming as many names as possible. This can be helpful in the long run in case the first name you choose isn’t available. Mine is, as you know, myhomemadeheaven.com. Once you’ve thought of some names, type it into the box to see if your domain name is available. Your first domain is usually free with Bluehost. Enter it in the box that looks like this:

3. Installing WordPress
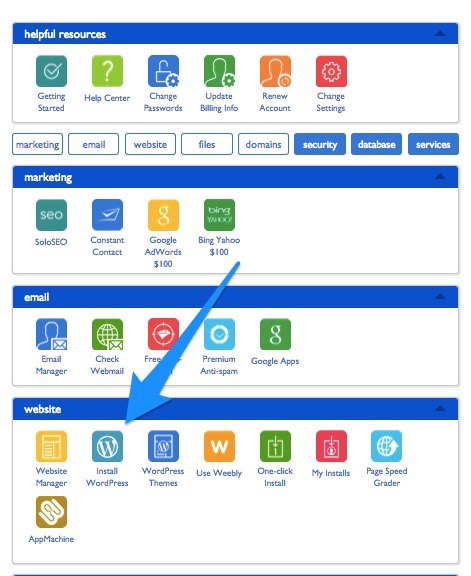
Next, after signing in, you want to click on the button that says “Install WordPress.”
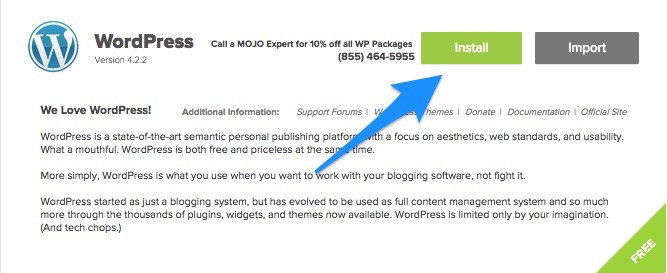
Click the green “Install” button at the top right of the page:
Once it has finished installing, you’ll see this notification. Click on “View.”
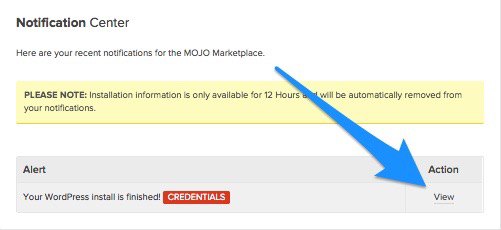
It will bring up all the information you need to access you site. Copy all the information under “Access your new WordPress site” and store it in a separate place where you won’t lose it. You’ll need this information to login.
Your ads will be inserted here by
Easy Plugin for AdSense.
Please go to the plugin admin page to
Paste your ad code OR
Suppress this ad slot.
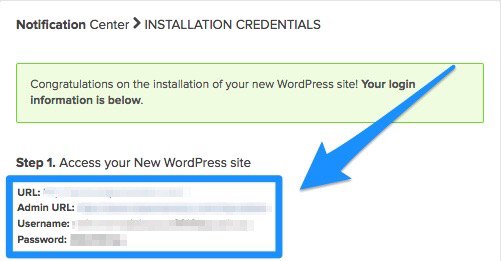
Type in your “Admin URL” in a new tab (you can also click on your site name after “Admin URL” if it’s blue and it’ll take you straight there, but just know that to get there each time you’ll need to type your “Admin URL” into a new tab). You will see a screen come up like this:
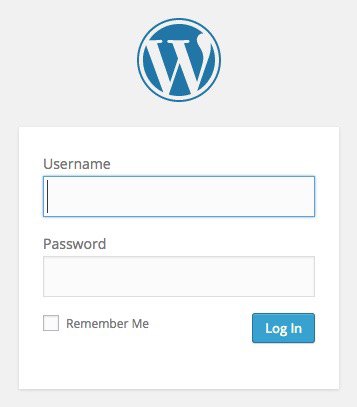
Type in your “Username” and “Password” to login.
This is what you will see after logging in. The Dashboard is like your main page behind the scenes of your site. You will create and fix everything from here along with the other choices along the left side bar (the black bar).
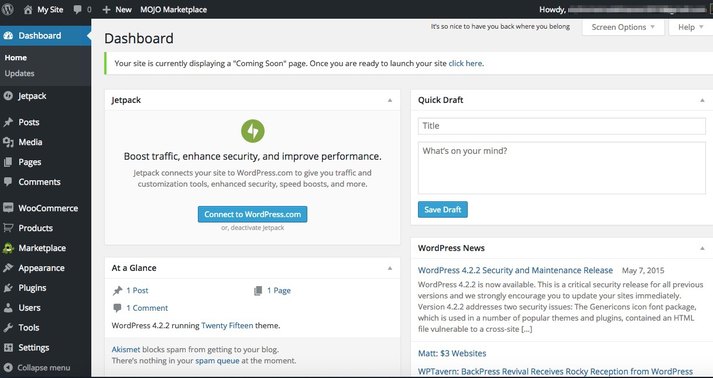
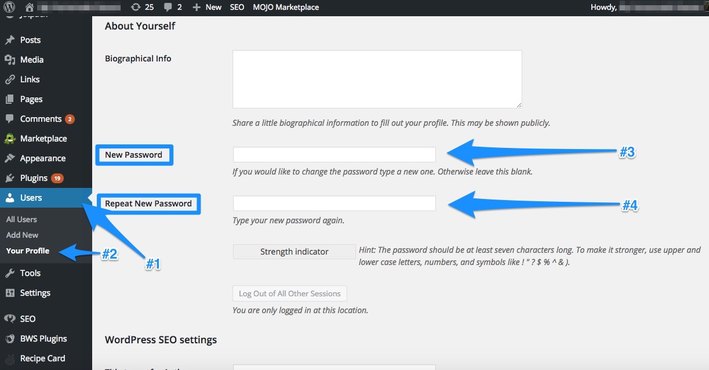
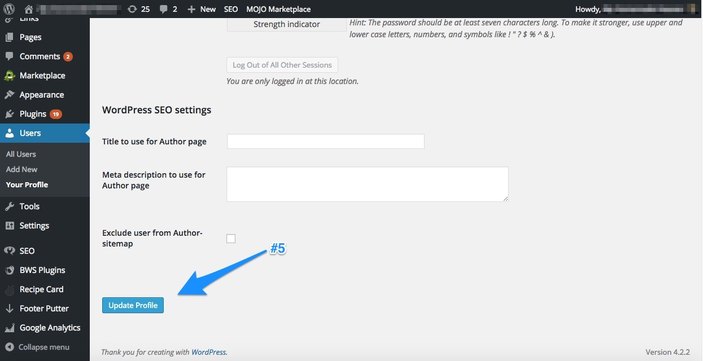
Once inside, if you’d like to change your password, go to “Users>Your Profile” on the lefthand side and change your password. Don’t forget to save it by scrolling down and clicking “Update Profile!”
4. Picking a Theme
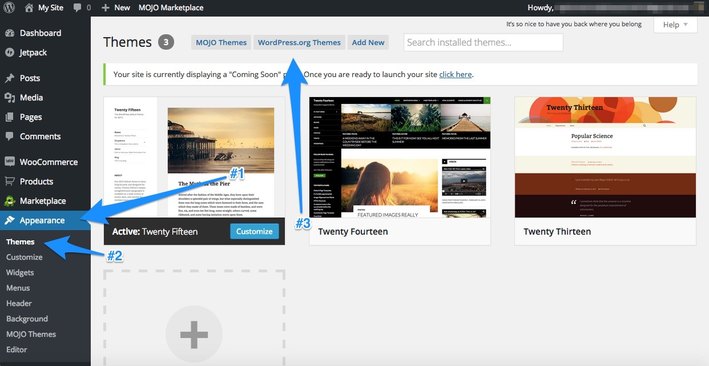
Giving it the look you want. You can do this by either finding a free theme (Option #1) or purchasing a theme (Option #2).
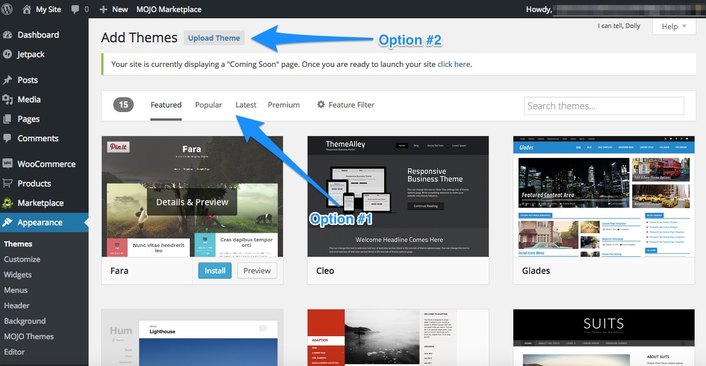
Option #1: To use a free theme, go to “Appearance>Themes” and click on “WordPress.org Themes.” Then you can click on the most “Popular” or “Latest” themes (see the next picture below labeled “Option #1”) available and search through what you see, and install the one that you like.
Option #2: If you’d like to purchase a theme, You’ll purchase the theme first, and then you’ll need to come back to this place in your Dashboard and click “Upload Theme” (labeled “Option #2” in the picture below) to allow your purchased theme to show up here so can you work with it.
Free Themes:
There are some great free themes out there, and that is actually what I started with on My Homemade Heaven. It was a great way to practice and learn how everything worked.
Purchased Themes:
If you would like extra support with your theme, I would definitely recommend purchasing a theme. Paid themes, are supported by the designers so anytime you have a glitch, you can contact them for assistance. They also help you fix and tweek all the big and little things on your site that may take you hours to figure out otherwise.
What I use:
I currently use Elegant Themes, and love it! They’ve also got some of the best prices with great customer service. Since signing up with them, they’ve been able to help me fix many things on my site quickly that used to take hours to figure out on my own.
So, if the technical stuff isn’t really your thing, I would HIGHLY recommend investing in one of these themes. They all have great reviews and can offer help with setting up your site.
3. Thesis Theme
Congratulations! You’ve just created your site! This a great time and the start to an exciting adventure! If you have any questions feel free to leave a comment below.
Stay tuned for additional information about how to develop and improve your sites!
What type of blog/website are you creating? Food? Fashion? Photography? DIY? Let me know in the comment section below! 🙂

Leave a Reply