Your ads will be inserted here by
Easy Plugin for AdSense.
Please go to the plugin admin page to
Paste your ad code OR
Suppress this ad slot.
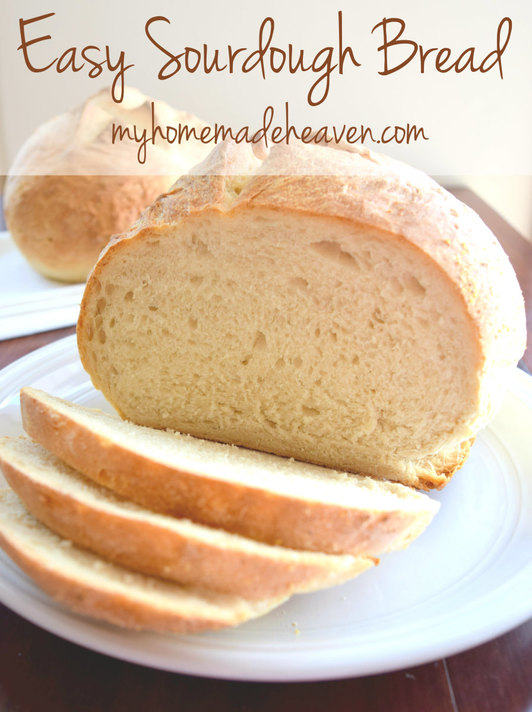
My first several attempts at learning how to start and use sourdough weren’t disastrous so much as they were uneventful and deflating. I had been so excited to use sourdough, and by the time I finally got a great starter, I really had no idea how to use it. My many attempts at making sourdough bread produced lumps of hardened, bitter cardboard that the rest of the family refused to eat, and I only ate them after loading them with butter and jam because I was convinced that there had to be SOME nutritional value left in them. Finally I found a site called Fig Jam and Lime Cordial, that explained the process very well. After reading it and following its steps I was able to make my first amazing sourdough loaf (that my entire family devoured-by the way) And I’ve been hooked ever since!
If you don’t have a sourdough starter you can ask someone you know who has one to give you some of their’s (this is the quickest way to start because you can begin using it right away). You can also purchase one like this one, or this one
. Or you can make your own.
This post is a combination of what I’ve learned from that site as well as other things I’ve learned from friends and my own experience. Learning to use sourdough can be a bit of a process, but once you understand it, it’s SO simple! Now we make it at least 2-3 times a week.
To start, I’d like to share how I prep my sourdough starter before I use it, since that’s what finally opened my eyes on how it’s all suppose to work, and hopefully, if anyone else is a little unsure on what to do, this will help.
Caring for your starter:
(Tips: Always use glass or plastic bowls, jars, and utensils when storing and mixing your starter. Don’t use metal unless it’s stainless steel. Also, use filtered water when feeding it. The chlorine and other chemicals in tap water can cause problems with you starter. I like to keep my fridge starter in a wide-mouth canning jar.)
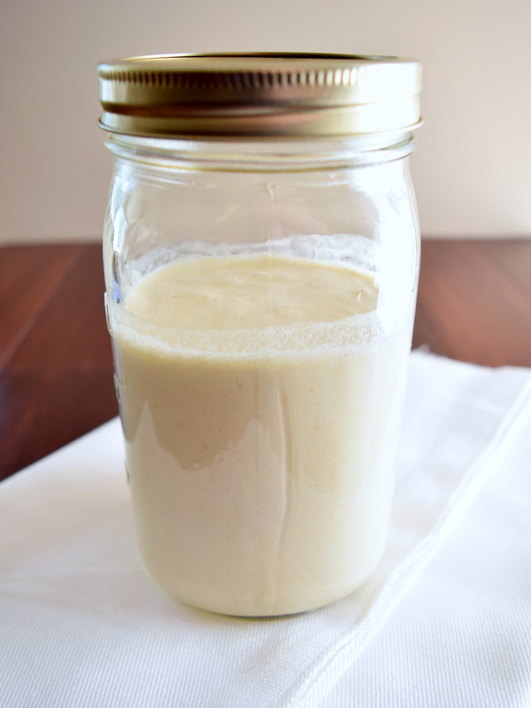
This is our refrigerator starter. His name is Reuben, and he is our main starter. I feed him once or twice a week depending on how much I use him. When you feed your starter you are giving it equal parts flour and water, so once or twice a week I’ll feed him 1/4 cup flour and 1/4 cup water and mix it in. If I use it more often and deplete most of what is in the jar then I’ll feed him in larger amounts, so maybe 1/2 cup or 1 full cup of both flour and water, and that gives me more starter to work with later. If you use up all the starter one day don’t fret, just feed it again and the remnants from the inside of the jar will continue to produce the sourdough-just DON’T wash out the jar until you’ve given it a chance to develop! You can however transfer your established starter to a clean jar so as to clean out the other jar.
You will notice that liquid often forms on top of the starter. This is called “Hooch” (I know it sounds funny, my husband thinks it sounds like a dirty word, but I promise that’s what it’s called). Some people like to drain this liquid off before they feed their starters because they say that by stirring it back in, it makes the starter more sour. I used to do this but found that the hydration of my starter would get way out of balance. Your starter should have the consistency of a muffin mix, but mine was getting the consistency of bread dough and it kept getting thicker every time I drained the hooch off the top. So instead, I started to stir it back in and just fed it again like normal, and I was eventually able to get my starter back to the proper consistency. I also didn’t notice a difference with it being too sour-it always tasted great with a very light flavor. If you notice that your starter seems too thick or too thin, just give it a few more feedings (closer together-maybe once a day or once every other day if you’re keeping it in the fridge), until you feel it’s back to the right consistency, then you can return to feeding it once or twice a week.
Using your starter:
If a recipe calls for “unfed” starter, then you can just pull some of your starter out of the fridge and use that in your recipe (don’t forget to feed your fridge starter again!). Otherwise, you need to prep your starter before you use it. Don’t worry, it takes some time but it’s a simple process and well worth it!
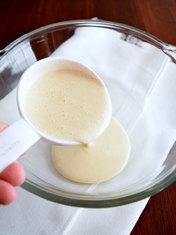
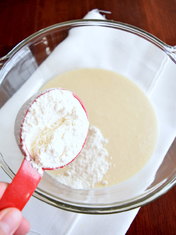
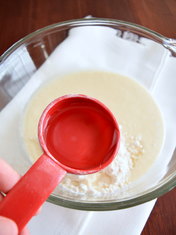
To prep your starter, pull out 1/2 cup of starter from your jar in the fridge. Put that 1/2 cup in a plastic or glass bowl and feed it with 1/4 cup flour and 1/4 cup water (mix it in).
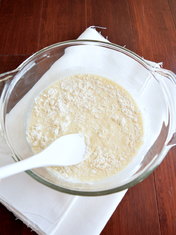
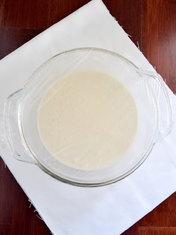
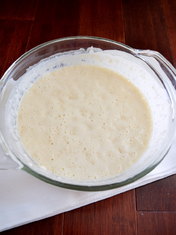
After you’ve mixed it in, cover it with a lid or plastic wrap and let it sit for 2-4 hours. It should start to bubble like in this third picture (if it doesn’t, don’t worry, just feed it again once or twice until it does.). You’ll want to feed it every 2-4 hours until it starts to bubble. Sometimes if your starter is really active it’ll be ready after 1-2 feedings. If it’s a bit more dormant, you may want to feed it every few hours for a full day to make sure it’s ready before you use it.
If I need more starter than usual I’ll feed it in larger amounts, so instead of 1/4 cup of flour and 1/4 cup of water, I might feed it 1/2 cup of flour and 1/2 cup of water, but keep in mind that it will take longer for your starter to eat through the extra flour and water. This is why if you’re leaving your active (or counter) starter longer without feeding it (overnight-for instance), you’d want to feed it more so that it has more to eat. At night I’ll feed my counter starter 1/2 cup of water and 1/2 cup of flour instead of 1/4 cup.
Note: After making your bread recipe, you’ll notice that you have extra counter starter left. Many people will use this left over starter to make things like waffles, muffins, donuts, cakes, cookies, tortillas, pasta, pizza dough, etc. You can use up the rest of your counter starter by making other things like these or continue to feed your starter every day if you’re planning on using it again soon. Just be aware that you will start to get a lot of counter starter that you’ll need to use up, give away, or discard.
Naming your starter:
Your ads will be inserted here by
Easy Plugin for AdSense.
Please go to the plugin admin page to
Paste your ad code OR
Suppress this ad slot.
Now, some people do this and some don’t, but let me share a quick story about this from a friend who shared it with me. This friend was an avid bread baker and used sourdough often. Her fridge starter was great and she had named it Sally. Her counter starter was struggling however. It wasn’t getting nice consistent bubbles like it was suppose to and she was ready to throw it out and start with a new one. That same day she was talking with another friend on the phone, telling her how she was going to throw out the starter because it just wasn’t working, and she had been trying to feed it for days. Her friend asked her, “Well, what’s its name?” My friend said, “It doesn’t have a name.” “Well it needs to have a name,” her other friend replied. My friend turned to the starter at that moment and said, “Your name is Fred.” Then she turned away and continued her conversation. About an hour or so later as she went back to look at Fred, she noticed that he had started to bubble, and low and behold, he has been an amazing and very active starter ever since.
Measurements and materials for your Sourdough Bread:
The majority of sourdough bread recipes are by weight instead of cups. This is because everyone tends to scoop flour differently (some fluff the flour, some scoop, others don’t, etc.), and those slight differences can make a big difference in your sourdough bread. Unfortunately, unless you own a food scale, you’re not able to do this. Many people also highly encourage using a dutch oven when baking your bread, like this one
or this one
.
When I first started making sourdough bread however, I didn’t have a scale or a dutch oven, and I realized, that although they are nice to have, you can still make this bread without them. For this recipe I have included measurements in cups as well as weight. You just need to be a little more aware when using the cups as it can sometime become too wet, but even with it being slightly too wet it still turns out great! I also bake it on a cookie sheet (instead of a dutch oven) with cornmeal sprinkled on the sheet under the dough. You can use parchment paper instead of cornmeal, just make sure it can handle the amount of heat from the oven. Most parchment paper will have a heat limit. The great thing is the crust comes out beautifully and delicious every time!
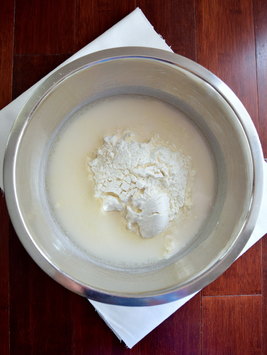
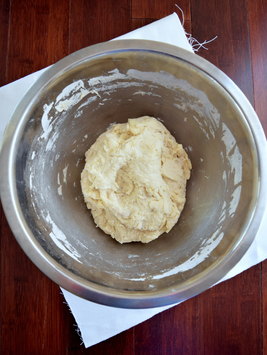
Add all the ingredients and mix them together, you may need to use your hands to really get it mixed well (sorry for the color difference in the bowls, I was making two loafs here). Let the dough rest (uncovered) for 15-30 minutes.
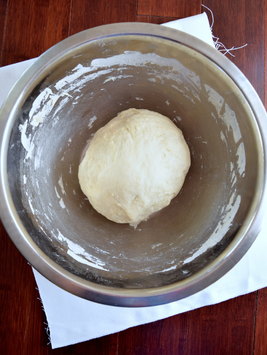
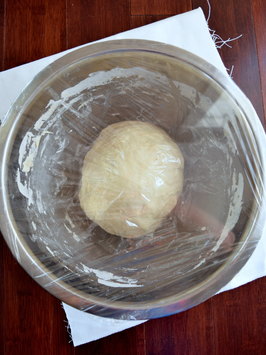
Then knead it again for 30 seconds to 1 minute. Cover it tightly with a lid or plastic wrap (I covered the ball of dough and the top of the bowl, but as long as it’s tightly covered, just wrapping the top of the bowl should be sufficient). Allow to rise over night or between 7-24 hours.
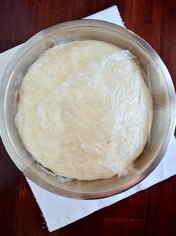
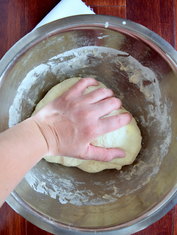
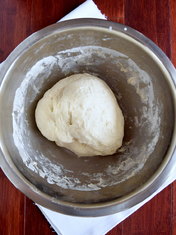
The bread dough should double in size (at least). Pull the plastic wrap off and knead it again for 30 seconds to 1 minute (I have found that this second kneading helps a great deal with allowing the bread to rise more evenly in the oven).
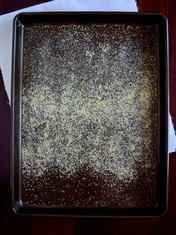
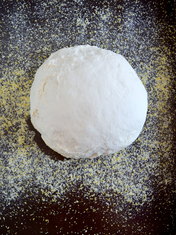
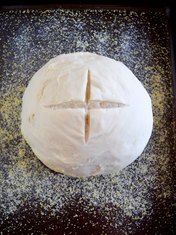
Preheat oven to 550 degrees or as high as it will go (don’t worry, you’ll turn it down before you put the bread in. The hot oven causes the yeast to burst and gives the dough one last lift before dying off in a process called “oven spring.”). Sprinkle cornmeal or place parchment paper on your cookie sheet or dutch oven. Shape your dough into a round ball and place on cookie sheet or dutch oven. Allow to rise for another 30 minutes to an hour (but not longer than an hour-you don’t want to exhaust the dough-it will rise even more in the oven).
Right before you put the bread in the oven, make some slits in the dough to allow air to escape while it’s baking. Use a sharp serrated knife like this one or one of these
. (These are great knives, by the way. I have the whole set, and love them!).
Put the bread in the oven and turn the oven down to 425 degrees. Bake for 20 minutes. Once the 20 minutes are up, turn the oven down to 350 degrees and bake for another 30 minutes.

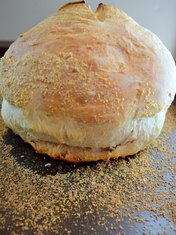
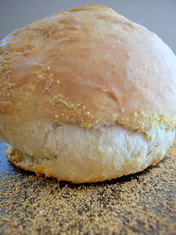
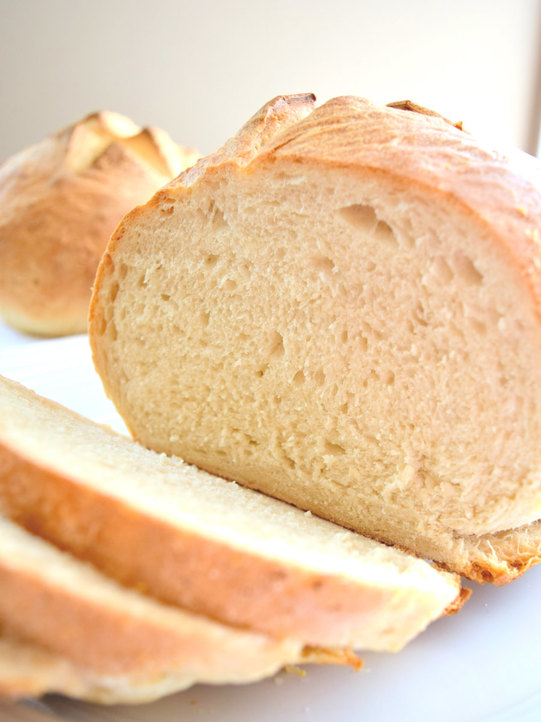
Once the timer dings, pull it out and allow to cool. If you cut the bread before it has cooled it will be gummy. So…, patience. I’ve added a few pictures of the back of the bread where the spring rise occurred. It looks like it stretched the dough from the bottom up, you can even see how high up the cornmeal is which shows how much it has risen. That’s what you want to see.
Quick Update: If you notice your counter starter isn’t bubbling as much as it used to, try putting it in the fridge, or starting a fresh counter starter from your refrigerator starter. I’ve noticed this helps with reviving or strengthening the starter.
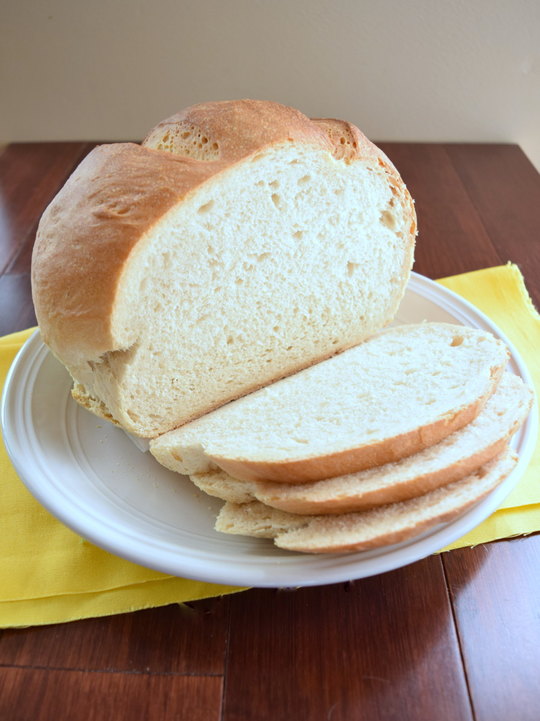


- 2/3 cups (150g) sourdough starter, fed (like explained above)
- 1 Tbsp + 2 tsp (25g) olive oil
- 4 cups (500g) flour*
- 1 1/2 tsp (10g) sea salt
- 1 1/4 cup minus 1 Tablespoon (250g) water**
- Mix all ingredients together and squish between fingers until no dry bits remain.
- Let sit for 15-30 minutes.
- Knead for 30 seconds to 1 minute, cover and let rise for 7-24 hours or overnight until doubled in size.
- Preheat oven to 550 degrees or as high as it will go. Prepare cookie sheet or dutch oven with cornmeal or parchment paper.
- Knead a second time for 30 seconds to 1 minute.
- Shape into a ball and place on cookie sheet or dutch oven.
- Allow to rise for another 30 minutes to 1 hour (but not longer than an hour).
- Cut 1-2 slits in the top of the dough just before placing it in the oven.
- Turn oven down to 425 degrees and bake for 20 minutes.
- When the timer dings, turn the oven down to 350 degrees and bake for another 30 minutes.
- Once the bread is done, allow to cool completely before cutting it. (If you cut it too soon it will be gummy).
- Enjoy!
- *Many people recommend using bakers' flour, but I've found that using regular white flour works just fine too. I have not tried using whole wheat flour in this but a friend of mine mentioned that the wheat flour tends to absorb more water than white flour, so keep that in mind if using wheat. She also mentioned that spraying it with water (using a squirt bottle) while it's baking in the oven helps to keep it more moist.
- **Add the water last and really try to mix/knead the dough. If you find at this point that you need a little more water then add the extra tablespoon back in. The dough should be very manageable and not sticky.

Well done, Mel! 🙂
Haha, thanks Dad! 😉
I am so glad you explained the “fed” and “unfed” thing. I began a starter last week and nobody explains the difference.
Thanks for your comment! I’m so glad it was helpful! 🙂
Excellent detailed information… I can’t wait to try this… I am waiting on my sour dough starter. Would love to see other things you are doing with your sour dough… like pancakes and other things… Thanks so much!!
Thank you! I’ll try and get more sourdough recipes posted soon. Let me know if you have more questions once you get your starter. Thanks for your comment! 🙂
This looks amazing! Definitely want to try this.
Thank you!! 🙂
My dough is rising right now. I can’t wait to see how this bread will turnout tomorrow. Thank you, Melani! P.s. Do you have a good sourdough pizza crust recipe? 😉
Yea!! Let me know how it turns out! 🙂 I have been working on finding a good sourdough pizza crust for a while, but haven’t found one that we LOVE just yet. I’ll keep you posted when I get a good one! 🙂
Oh my, A-mazing! The entire loaf was devoured within minutes of slicing into it. Wow! What a wonderful recipe. Thanks again, Mel! You’re the best! I just mixed up another batch and I can’t wait to eat it tomorrow. We had delicious sandwiches today, but my favorite was eating it with butter and honey. Yummo! I forgot to put the slits in… I was worried, but all was well. Thanks again!
I’m so glad you like it! That’s about how quickly our bread disappears too. I’ve started making two loaves at a time now just so it’ll last a little longer! Thanks so much for your comments!! 😀
Love this post! I’m just starting and it’s so hard to get it all right without feeling overwhelmed and I think this explanation is just perfect. I’m currently sitting watching my bread bake now 🙂 Question: what are your baking times for this if you use a Dutch oven?
Hi Laura! It’s so true, it can feel so overwhelming in the beginning, but I’m glad this post helped! 🙂 If using a Dutch Oven I would bake it at 425 degree for the first 20 minutes and then turn the oven down to 350 degrees-like normal, but I would check the bread after 20 minutes and then add more time (up to 10 more minutes) if needed. You want to bake the bread until the crust is hard and well browned and the bottom sounds hollow when you tap on it (you’ll need to use gloves to turn the loaf over and tap on it with your knuckle-it should sound like a drum). If you’re not sure, adding extra time won’t hurt the bread, and it’s much better to have it slightly over cooked than undercooked.
Thanks for this recipe! I have been trying different internet sourdough bread recipes for the past 6 months, including no knead sourdough bread. I do not have a Dutch oven and am not sure if I will get one. The recipes that I have tried use less flour and do not include olive oil. I was worried about burning the bottom of the bread when following your recipe (I used a cookie sheet, a little canola oil and cornmeal). It did not burn on the bottom. I also let it rise for about 15 hours due to scheduling issues and worried that 15 hours was too much for the first rise. It did not seem to be too long. The bread baked beautifully except I should have rotated the pan during baking. Some of the top did not brown. It is delicious and so far, I am happier with your recipe than all the others I have tried.
Hi Emily, thanks for your comments! I’m so glad you like it! It’s one of my favorites too. 🙂
I wasn’t completely happy with my attempt at this bread. While it did rise nicely the first 16 or so hours, when I kneaded it the last time before baking the dough had become very sticky. Is there any rule of thumb regarding texture, and how much flour to add? Some sourdough recipes call for a stick dough. Thank you for your help!
Hi Kathy,
If your dough is too sticky, this is what I would do: Follow everything as normal, but when you get to adding the water, only add 1 cup of water, and then add 1 tablespoon of water at a time just until the dough is moist enough to come together completely. This is what I will often do since using cups to measure the flour can vary each time depending on home much it’s packed into the measuring cups-verses weighing the ingredients on a scale, etc. Let me know if this helps! Thanks for your comment! 🙂
Thank you! Even though the bread was sticky before the second rise, both times that I’ve made it, the final bread rose! I will back off a bit on the water, but after MANY bad beginner loafs of bread (flat, rock hard, doughy), this is the recipe that works. Thanks again!
Oh good! I’m so glad to hear!! Thanks for let me know and I’m glad it turned out! 🙂
I just received my very first sourdough starter, and after spending WAY too much time googling recipes to try, techniques to use and various tips to take into account when you are first starting out… , I finally settled on your recipe and it was PERFECT! I was exhausted after reading countless recipes, I found your recipe and instructions easy to follow, so thanks for that! I highly recommend to others, to use a scale! Your recipe calls for 4 cups, and my weigh scale hit 500 grams after only 3 cups; so that really is quite a difference! Invest in a scale people! I did not get a hard crust, but I’m okay with that. I actually like a softer crust. And seeing as this was my first time, I am beyond happy with my results! The only thing I did different is, I put a lid on my dutch oven for the first 20 minutes to retain moisture. It’s VERY dry where I am, and it’s -30 out at the moment, so I was worried about moisture levels. Other than that, I followed it exactly. My dough rose after about 12 hours. Tastes divine! Thank you for sharing!
Hi Shanda, what a great comment! I’m so glad you found the instructions easy to follow and that it came out so well! I can’t believe it’s -30 where you are! Good luck and stay warm!! 🙂
I’m in the middle of making my first sourdough bread with your recipe. So far, so good. I did weigh all my ingredients, and the dough was perfect. My rise time was just under 12 hours, it’s on the second rise right now. The dough was a bit sticky, but as I kneed it in the bowl, the stickiness went away & cleaned the bowl nicely. I’m using my dutch oven and was wondering about using the cover. I live on the rainy side of the mountains, so alot of moisture in our area. I’m going to try with the cover for the first 20 minutes and see how that works. Will let you know when we are enjoying our bread!!!
Hi, so the first loaf is out of the oven. The crust is absolutely gorgeous, crisp yet tender. I covered the dutch oven the first 20 minutes – 2 more loaves to go, will try uncovered throughout full cooking time and see which I like better – will report tomorrow. I used Avocado Oil – it’s a better fat to use than just plain oil, and guaranteed to be Organic and non GMO. Problem with Olive oil – unless you know how to buy it, you can get a mix of Olive & vegetable oil. I’ve gotten pretty picky with my oils – Omega 3’s are good – but Omega 6’s plague us & your oil could just be nothing better than vege oil GMO and filled with pesticides. I love my olive oil – just be careful what you buy. The Avocado Oil did a great job.
Lastly, this is the BEST and EASIEST sourdough I have ever made – thank you for sharing!!!
Do you cover the dough for the second rise?
No, I usually just put them in the oven (uncovered) with the light on (no other heat) to let them rise.
I made this last night. AND I’M IN LOVE. Thank you for an easy, simple recipe. Going to be a family staple. Thank you!
I’m so glad you enjoyed it! Thank you for your comment! 🙂
Thank you for this recipe. It’s going to become my go-to! I followed it as is with a rising time of 14 hours. I loved how it came out! The crust was crispy with the perfect texture on the interior. The sourdough taste wasn’t really there though. I’m a newbie at this. I’m not sure what my mistake was (starter wasn’t active enough, too much flour since I don’t have a scale, etc.). I would love to hear your thoughts. Thanks so much !
Hi Amanda, I’m so glad this recipe has been helpful to you, and that you have enjoyed it! 🙂
If you want your bread to taste a little more sour, there are a couple things you could do:
1. You can not feed your sourdough starter as often (the more hooch that accumulates on the top, the more sour your starter is becoming), although it also becomes less active. I would probably feed it half as much as what I mention above, this will keep the starter as active as possible, but still give it more time to sour.
2. Let your bread sit in the fridge for a couple of days. The starter will continue to work even after you’ve baked the bread and it will become more and more sour (and slightly tougher) over the next few days. I usually notice this around day three.
I hope this helps! 🙂
I just put mine in the oven. I had trouble with the second knead – it was very sticky (it did rise well for the first rise and it took about 18 hours – could that have been too long?). Could the problem be because I used bread flour? I did weigh all my ingredients accurately. I proceeded with the knead, adding about 1/4 cup of additional flour. Let it rise for an hour – it did rise some, but not hugely. I put mine in a large dutch oven and, so far, it looks like it is baking up pretty flat. Any advice for me?
I will also say that I found the oven directions a bit confusing on the printed instructions. Why would you turn the oven on to 550 degrees if you aren’t going to use it for another hour while the bread is rising? And I didn’t realize I needed to turn it down to 425 degrees when I put the bread it. Went back after 15 mins and looked at this web site and figured it out.
Hi Kathy, thanks for writing in! I’m sorry about the struggles with your bread. Using bread flour will make it slightly more sticky, but overall shouldn’t cause a problem.
My thoughts are to try reducing the water by 1/4 cup to start, and then add in just enough so that the dough holds together, but isn’t super sticky. Slightly sticky dough is okay and slightly dry dough is okay-I’ve had both turn out well.
If your dough took 18 hours to rise I’d say your starter probably needs a few more feedings to become more active and strong. All starters are a little different, and some are more temperamental (i.e. if you change from feeding it all-purpose flour to whole wheat flour it can take longer for your starter to adjust, etc.). Some starters become very active after only two feedings and others may take five feedings, but the more bubbly your starter is the stronger it is. Just make sure that you use your bubbly starter while it is actively bubbling and growing, and not when the bubbles have been sitting for a while and are starting to pop or are just sitting atop a starter that is starting to develop hooch on the top. Because then it is becoming dormant and has lost its strength. You may also notice that sometimes you need to give your counter starter a break by putting it in the fridge for a day or two if you notice it struggling.
This is a lot, but I hope it helps! Using sourdough starters can be tricky at first, but are wonderful once you get the hang of it! Good luck and let me know how things go!
Do you include the oil with the bread ingredients when first mixing?
Hi Marlene, Yes, I add all the ingredients together including the oil and then mix at once.
I first made this bread in June of 2017. I loved it at first bite!! Now this is my staple bread – My husband loves the bread but wanted a bread that he could make sandwiches with. So I purchased a Pain de Mie (Pullman loaf) pan and use that instead of the historical round loaf. It makes absolutely the most beautiful bread. I’ve read that some folks have a problem with the dough becoming too wet. I have started mixing in about 100 grams of sprouted wheat flour and then adding 400 grams of regular white flour- takes care of any extra moisture. Also, my starter is very active – so if I make my dough in the early morning – I have bread out of the oven by bed-time. Sometimes faster during the summer with the additional heat.
Lastly, I’ve done some reading on sourness of your starter. It is suggested that you let the sourdough rise to the sponge and then let it fall – if you leave it open to the air, the starter will become more sour – has something to do with it feeding on the bacteria in the air – it doesn’t hurt you or the bread – just makes the starter feed on additional source that makes it more sour.
I absolutely love this recipe, – it’s fast to put the dough together, then you go about your day until it’s time to get your bread baking. I like to make my dough before I go to bed – then I’m baking fresh bread in the morning. This is the only bread we eat!!!! Can’t thank you enough.
Thank you Marge! That’s a great idea with the Pain de Mie Pan, I’ll have to try that! I’m so glad you enjoy this recipe as much as we do!! 🙂
Well, Covid- 19 has us quarantined. I went to 4 places last weekend looking for bread. When I didn’t find any I bought flour instead. One store did not have flour or yeast. So, I decided to make my first starter while I used up the last of my store bought loaf bread out of my freezer. My first batch is on it’s first rise as I get ready for bed. I can’t wait until tomorrow.
Hi Lana! I hear you with staying at home! I’m sorry to hear it’s been so hard to find bread! I’ve been making bread double time it seems since staying home. I hope your sourdough bread turned out! Did you get your starter from a friend? Or start it from scratch? I know when I need to start one from scratch it takes about a week for it to be ready. Let me know how things turn out!
I only have self rising flour. Can I use that?
Hi Lynda, that’s a great question! You could give it a try, but I’m not 100% sure it will work. Self rising flour contains baking soda and salt. Normally you could just reduce the baking soda and salt in the recipe (like in a cookie recipe that called for baking soda and salt), but since this recipe doesn’t call for baking soda, there’s no way to do that. I’m not sure if it would work, but you could always give it a try. Good luck and let me know how it turns out! 🙂